
Trigger a Consent Email for Contacts & Leads
How to Automate Consent Email Triggers in Dynamics 365


Imagine your sales or customer service team receiving frequent requests from customers asking to change their email preferences. It seems like a simple task, right? But here’s where it gets tricky: for compliance and legal reasons, organizations Should Not manually update these preferences on behalf of their customers.
Why? Consent activities, like opting in or selecting specific communication types, must be carefully tracked to ensure transparency and compliance with data privacy laws. Failure to do so could lead to legal complications, making it crucial to handle email preferences the right way.
To solve this issue, it's important to provide a button or field that triggers a predefined consent email, allowing customers to update their preferences directly.
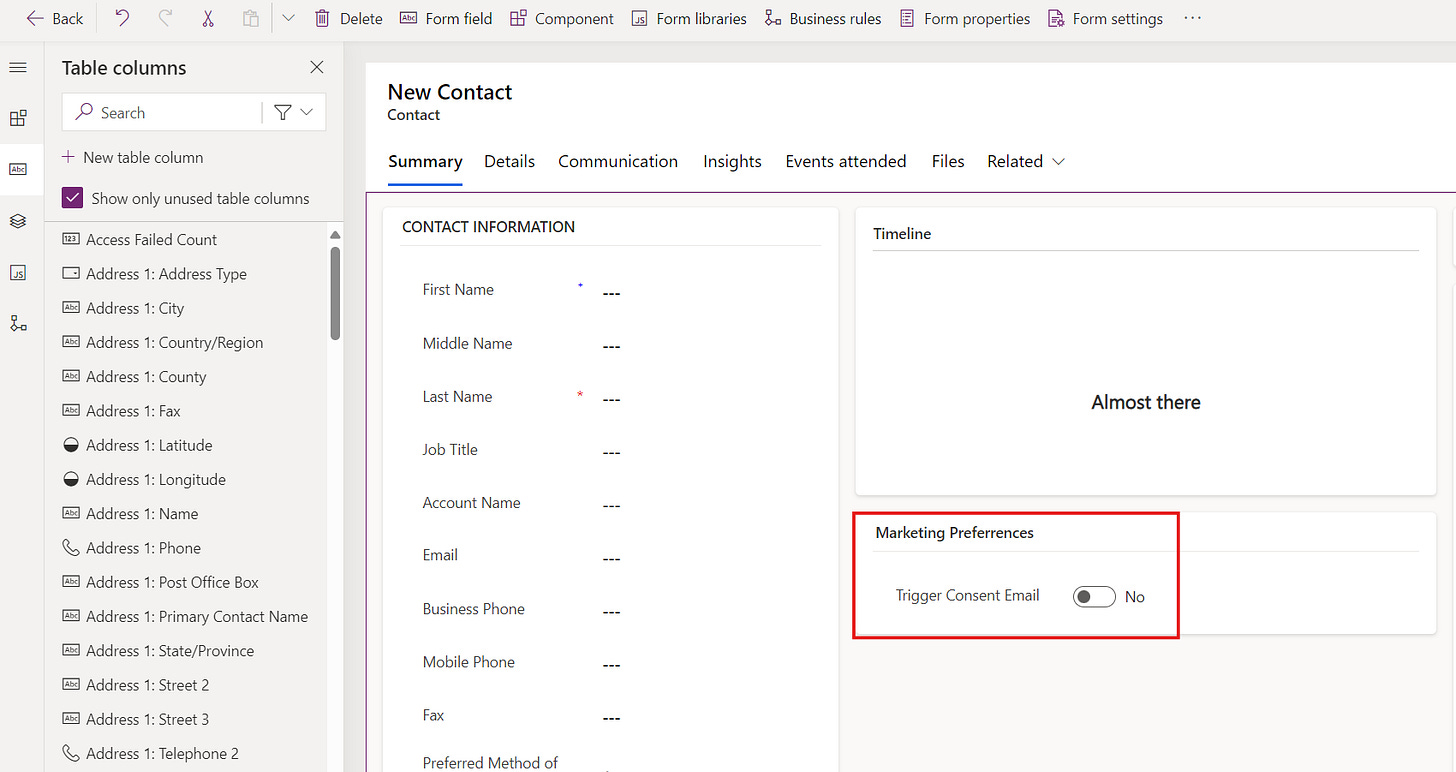
In my solution, I implemented a trigger using a Toggle field within the forms, eliminating the need for a developer to create a button through Command Designer or Ribbon Workbench.
A- Create a new field
First step to do is creating a new field on the Contact/Lead table. Select Choice type with Yes/No values
You can also create a new 1-column section to add the field into it.
As an optional step, you can change the Yes/No values into a Toggle. To do this, select the field > From Properties section, expand the Components > Add Component & select Toggle > press Done
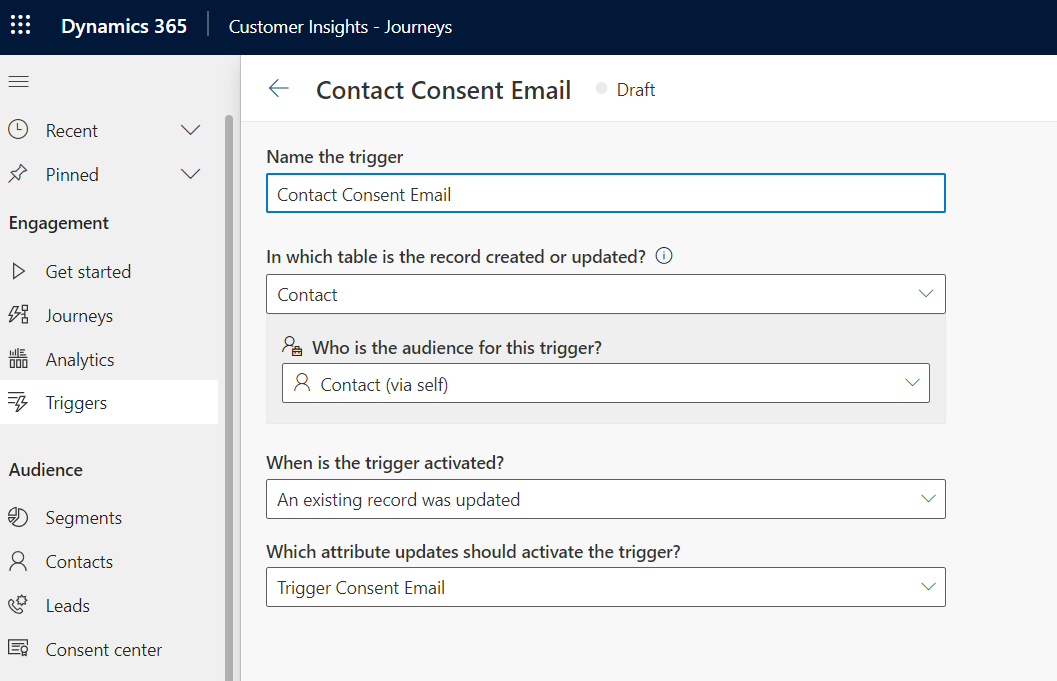
B- Create a Trigger
Second step is to create a Trigger, so from the Customer Insight Journey app, navigate to Triggers
Create a new Trigger > give it a name such as “Contact Consent Email” > choose action “When a record related to a customer is created or updated”
In the Trigger configuration screen, set the below:
Table = Contact or Lead
Audience = Contact (via self) or Lead (via self)
When is the Trigger activated = An existing record was updated
Attribute that activated that Trigger = select the newly created field

C- Build your Marketing Email
In this step, all you need to do is build and design your marketing email to be sent to the customer.
Make sure to include a button in the email that refers and redirects the recipient to the preference page of your compliance center.
D- Create your Journey
Navigate to the Journey area and create a Trigger base journey
Select the Trigger we already created > add the following condition
Select the newly created field “Trigger Consent Email” = Yes


Create the journey and add the Consent email as an action step
E- Build a PA flow to switch back the toggle to “No”
This is an optional step, but keeping the Toggle always set to “Yes” can seem like an inelegant solution. If CRM users need to re-send the consent email to the same contact/lead, they would need to manually switch it back to "No" and then to "Yes" again.
To automate this, you can create a simple Power Automate flow with the following steps:
Trigger condition: When the Toggle field is changed to = Yes
Second Step: Add a Delay step to wait for 10 minutes (or any needed period)
Action: Update that field to “No”
Conclusion
This is all you need to do to implement the solution. Now the sales or customer service team can easily switch the Toggle field to “Yes” to trigger a predefined consent email based on the customer’s request.
They can also view the triggered email in the contact’s or lead’s timeline within 1 to 2 minutes.
This helped a lot! Very clear and easy to follow 👍