
Displaying Marketing Elements on Custom Contact & Lead Forms
Unlocking Key Marketing Data for Custom Contact and Lead Forms - Dynamics 365

Most organizations that start implementing the Dynamics 365 Customer Insights Journeys (Marketing) app are likely already using the Sales and/or Customer Service apps, often with Custom forms for Contacts & Leads.
As a result, you may have noticed that certain marketing elements are missing from these customers' tables, or perhaps the business or sales teams have already raised similar concerns, such as:
Has this contact participated in previous marketing campaigns?
If yes, how can I view the marketing communications sent to this contact?
Where can I see the marketing consents this contact has granted?
The good news is that all these functionalities are available by default. The question is: how can we make them visible within our custom Contacts & Leads forms?
In this article, I will explore solutions addressing the following topics:
Show Marketing Insight tab in custom Contacts/Leads form
Display the Communication (aka Consent) tab in custom Contacts/Leads form
Enable Marketing Interactions in custom Contact/Lead form timeline
1- Show Marketing "Insight" tab in custom Contacts/Leads form
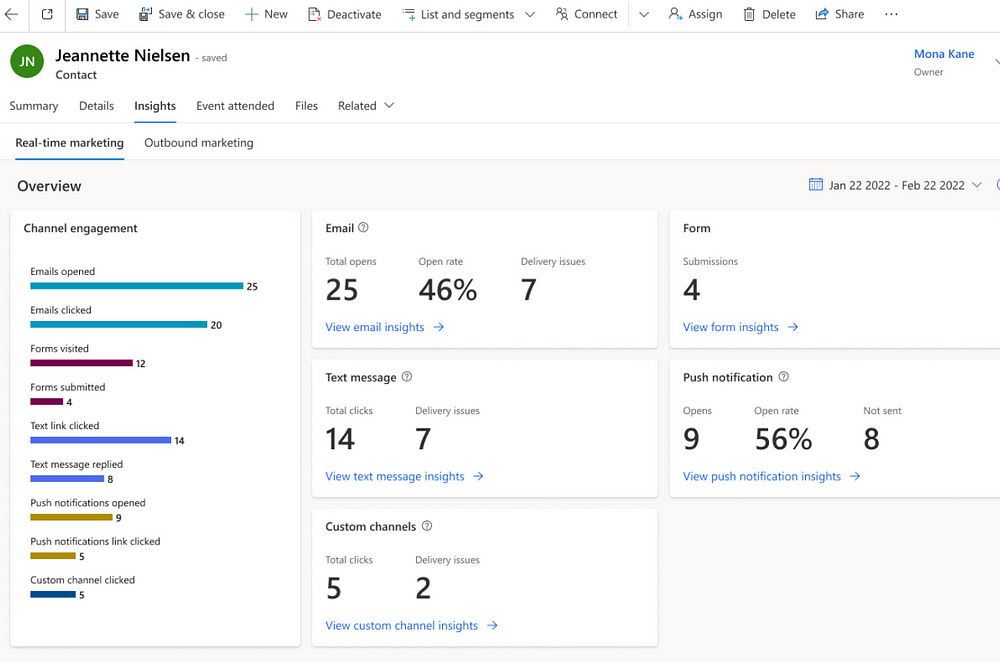
The Insights dashboard provides an overview of a customer engagement across various marketing channels, including emails, text messages, forms, push notifications, and custom channels.
It also displays key metrics like opens, clicks, submission rates, and delivery issues, offering a quick snapshot of how a contact is interacting with your marketing efforts
To make this tab/dashboard visible, we have to follow these steps:
Navigate to the Power App Maker and open the Contact or Lead form you want to add the Insight tab on.
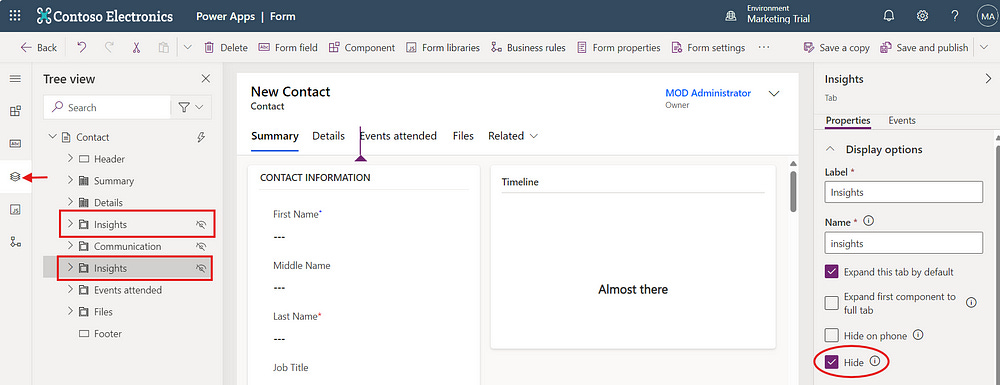
First, we have to check if the Insight tab might be hidden on the form. So navigate to the Tree view, and check if the Insight tab is hidden or not.
There might be two tabs with the same Insights name, one is used for Outbound Marketing and the Other for Real-time marketing.
If you find them, press on each tab > untick the “Hide” flag from the Properties section, to know which one to keep visible.

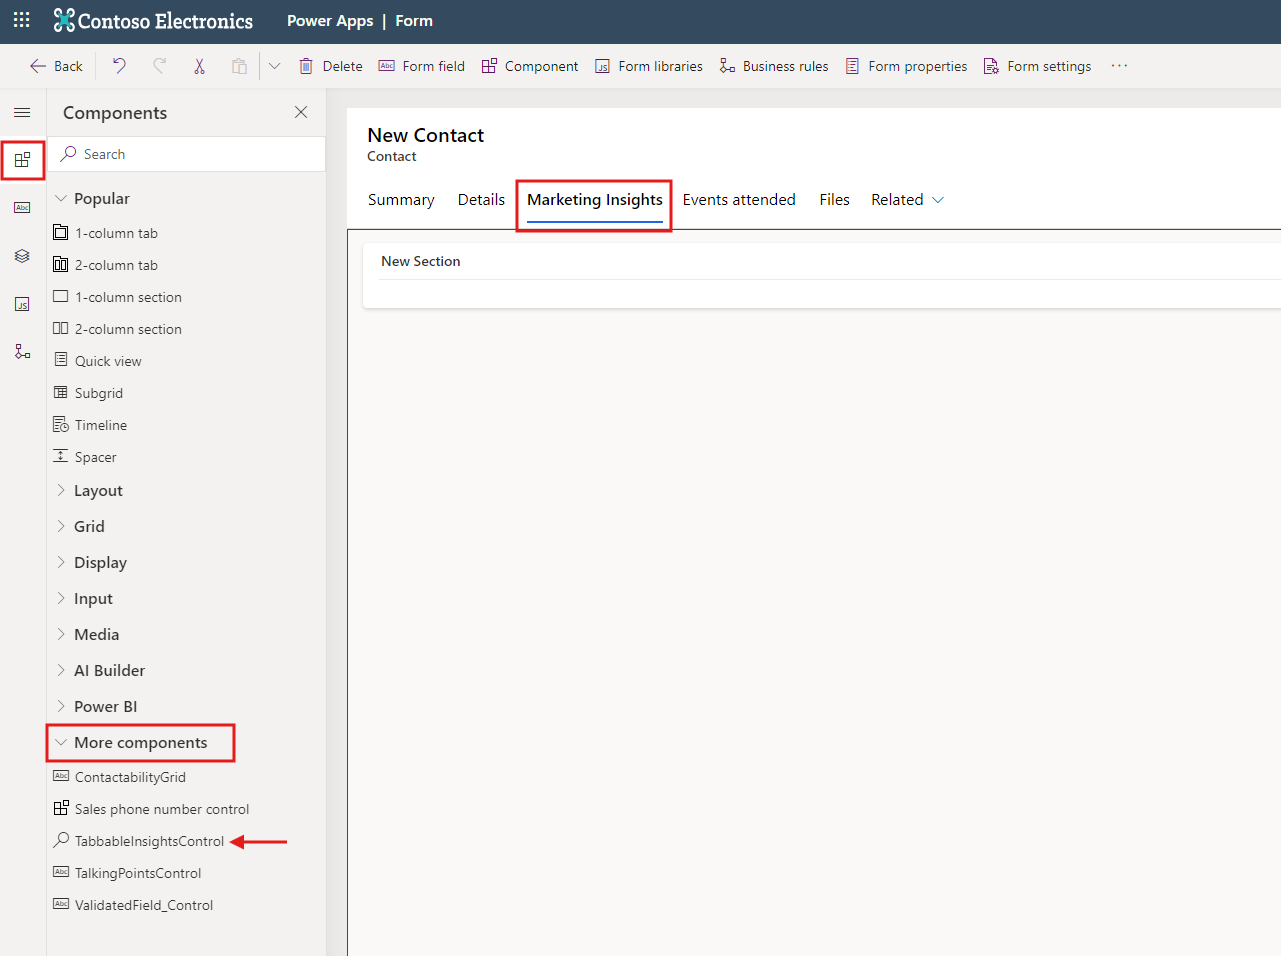
If the Insight tab is not there, then navigate to the Components section > create a 1-column tab > give it a new Label such as “Marketing Insights”.
A new section should be automatically added to the Tab. If not, then manually add a 1-column section to the new tab > Hide the "Label” of that section
While the new Tab is selected, expand the More Components group from the Component section
Find the “Tabbableinsightscontrol” and press on it (or drag and drop it into the newly created section under the Tab)

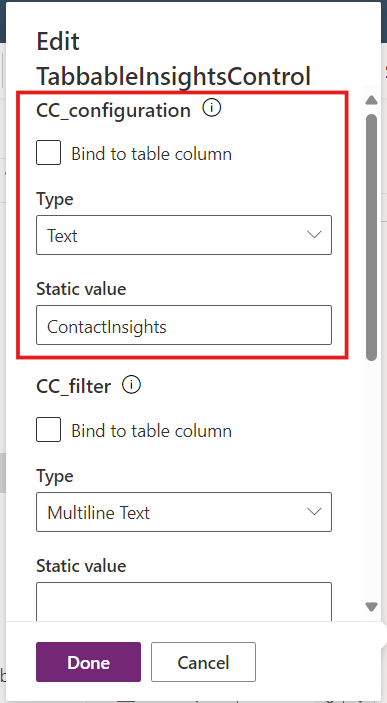
In the Control properties, set the following:
a. CC_configuration
- Type = Text
- Static value = ContactInsights
Keep the other properties with no changes
Once you press on Done, the Insight tab should be refreshed and marketing charts will be added.
Last step is to Save & Publish the changes.
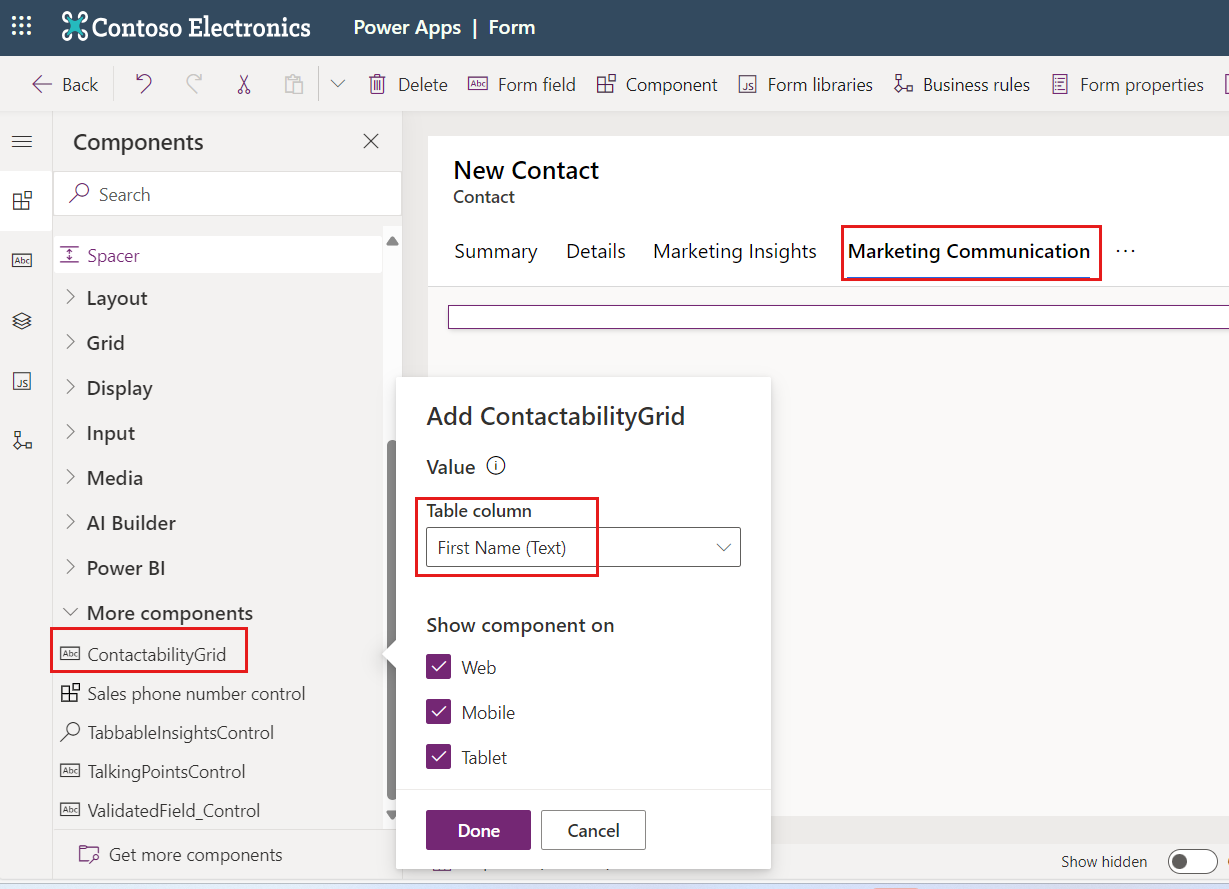
2- Display the Communication tab in custom Contacts/Leads form
The Communication tab shows the contact's or lead's preferences for receiving marketing communications. It tracks their consent, opt-in/opt-out statuses, and ensures compliance with data privacy regulations like GDPR.
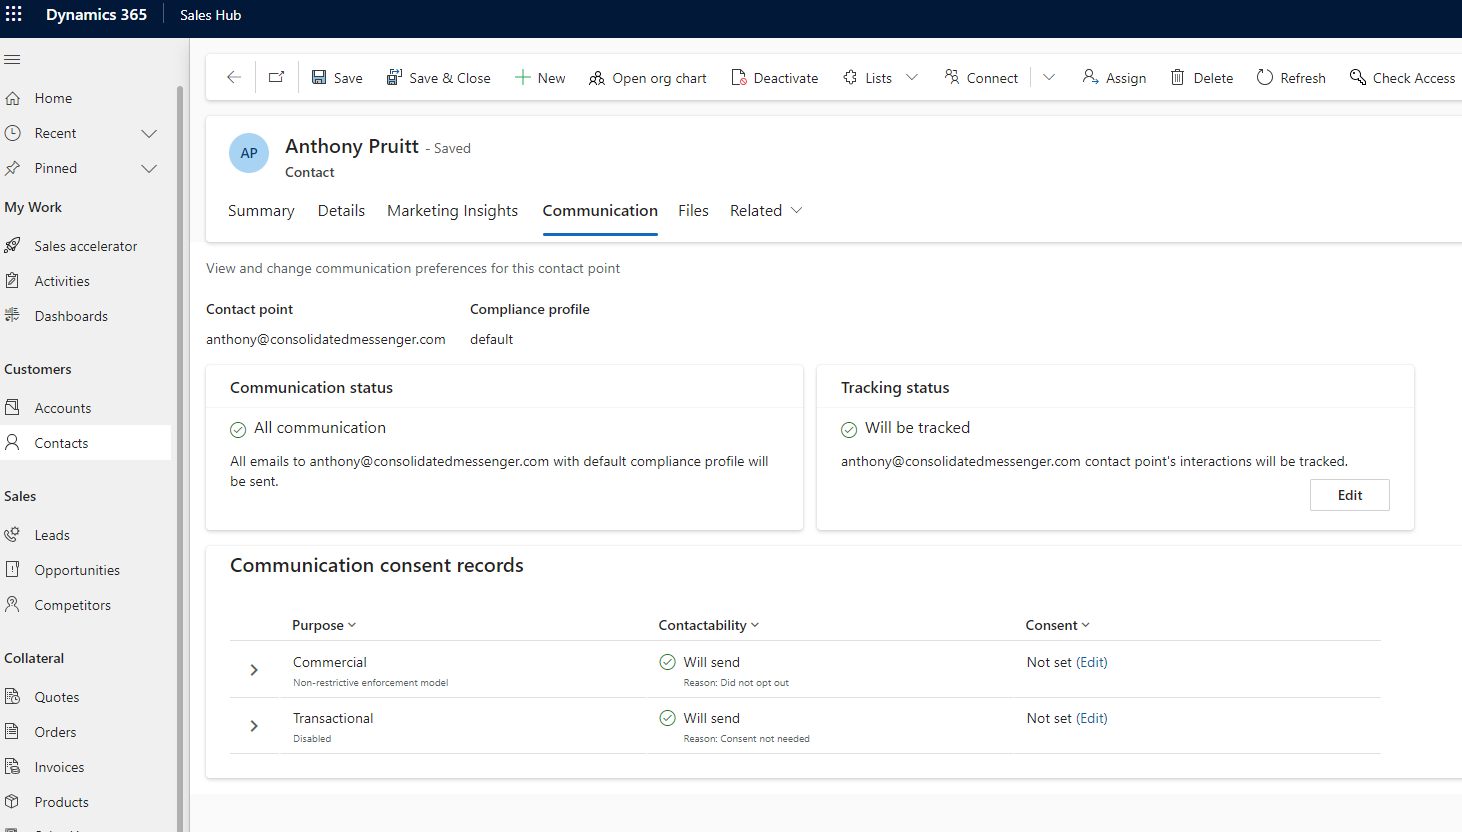
To make the Communication tab visible, follow the same steps mentioned above for the Insight tab.
The only difference is adding another control component named “ContactabilityGrid” after adding a new tab to the form.
For the Control properties, just select any Table Column from the drop down, such as “First Name”.
3- Enable Marketing Interactions in custom Contact/Lead form timeline
Marketing interactions refers to the activities and engagements a contact or lead has had with your marketing efforts, such as emails opened, forms submitted, events attended, or other tracked interactions. These interactions are logged directly in the timeline of the contact or lead record in Dynamics 365.

Before you start, note that all marketing interactions will be posted in the timeline, and there's currently no option to filter them by default.
The following steps show you how to add the custom connector to your timeline component:
From the Power Apps maker, navigate to your solution and select Tables > Open the table you want (for example, Contact), and then select the Forms area
Open your custom contact/lead form and select the Timeline component in the form.
To add a new custom connector, in the Properties pane for the timeline component, go to Custom connectors and select Add connector

The New custom connector pane is displayed. Add the following details and select Save:
Constructor:
msdynmkt_DynamicsMktTimelineInteractionAnalytics.TimelineInteractionAnalyticsResourceResource path:
msdynmkt_DynamicsMktTimelineInteractionAnalytics


The custom connector is now added to the timeline component. Save and Publish your custom contact/lead form.
The timeline in your custom contact or lead form will now show the marketing interactions.
Very insightful article Siraj, thanks for sharing!